DIY Repurpose and Organize
A little repurpose and organize planning can be what you need to get it can be done – whatever your “it” might be. It just takes a little bit of planning, a little bit of effort and a little bit of investment to make it work out. As part of my 8 Week Health and Wellness Challenge, I have been tackling projects around the house and around the property. This week, I had my eyes on the back porch.

We had big plans for the back porch. I envisioned all of the events we could host. My husband envisioned empty space (he does that a lot). After two years of default storage, the back porch just became a cluttered mess.
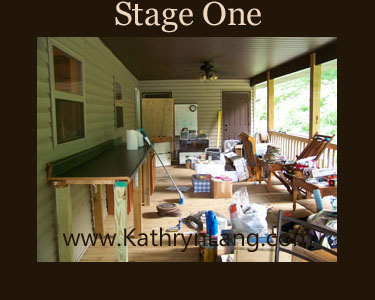
This DIY project for this week was all about organization. I wanted to get things into a more useful place but I also wanted to be certain that we could do all of the things we wanted to do with the space.

Just like with the front porch, we started with a plan to repurpose and organize. We talked about all the things we wanted to be able to do and the best way to make it happen. I mentioned last week the different sections for the back porch that we needed and the plan included each idea.
DIY Repurpose for the Back Porch
Wet/Dry Space: we added an inground pool to the backyard two years ago. Last year, the kids had a tendency to come out of the pool and sit down on the gliders and rocking chairs – which meant the cushions would have to be hung up to dry. That just does not work out well. In the repurpose DIY, we made clear seating arrangements.
The picnic table is for the wet area on the back porch, but we also added more seating to the pool deck (although no food is allowed over there). It is an indoor dining room set, but I covered the benches with contact paper to help protect them from the wet seats.
The area was heavily tested with around 25 wet kids this past weekend. It worked like a charm.
The dry space is all about the rocking chairs and gliders. Most visitors to the back porch gravitate to these seats, so I wanted to be sure to protect them from the wet folks. Not a single wet child tried to get into one of the rocking chairs or gliders (although the grown ups rarely gave them a chance) but because of the separation of space I think it will be easy enough to keep the wet folks away.
Workout Area: several years back, my mom and dad purchased a very nice weight bench for the boys, but we have never had the “space” to set it up. My husband invested a little bit of his time to put it together and it has found a home at the opposite end of the porch from the picnic table.
Craft Space: The bar is far from perfect. I did have to purchase two 4×4 pieces of wood to make the legs. Discount Building Supply was kind enough to cut the pieces to the size I requested, but they did it with a chainsaw. The cuts were almost perfect, but I will probably have to make a few adjustments. Four trunks we purchased from an estate sale hosted by Girl Friday in Guntersville completed my “little bit” of investment for this project – and also provided the rest of the storage we needed for the craft supplies and sporting equipment.
Total Cost: $50.00 and 5 hours (plus 2 hours for building the weight bench). We still need to add the doorknobs to the doors at the end and do a little more final cleaning, but all and all we stepped away very excited about the results.

Repurpose and Organize for Your Next DIY Project
-
1. Make a plan. Measure your space and understand your space. Make a list of what you need from the space. Take an inventory of what you have for that space – in supplies but also in current materials that need to be stored. The more information you have to work with the more you will be in a position to utilize your space to its most potential.
2. Think outside of the box. In our case, it was inside the box. I went to the estate sale for one trunk in particular, but so the other four and snapped them up as well. Three of them are on casters, and I will install casters on the fourth. The best part is that they can double as seating – and I am thinking up ways to make the best use of that little blessing. Tim Gunn tells contestants on Project Runway to “make it work.” That should be applied to your DIY, remodel, repurpose and sometimes everyday life. Things may not be perfect, but with a little out of the box thinking you can make it work for your need.
3. Be flexible, even when you are working alone. Situations do come up that force a change. If you refuse to change then something WILL break. Developing a flexible attitude will help you ensure that it is not you that breaks. This particular rule is ESPECIALLY valuable when working with others. Although my husband and I had talked about separating out the areas, we had not dedicated the space. I had one vision and he had another. His vision made more room for the workout space without interfering with the rest of the spaces, so I was happy to be flexible with my vision.
4. Let it GO! The most important thing I learned from this project was to let things go. We had a corner cabinet (leftover after the tornado remodel) that we have used for storage outside. It almost completely fell apart when I picked it up to move it. Instead of trying to put it back together, I let my husband throw it in the burn pile. He gets VERY excited when he gets to throw things away (the burn pile is just gravy). It was not the only casualty. I kept more than he would have liked, but found a home for it all. That was his turn at being flexible. If it is not in a home or if you have not used it in a year, then it is probably time to let it go.

DIY projects are more than building (or tearing down). Sometimes the best DIY project is one that includes purging, repurposing, and organization. We now have two outdoor spaces ready, willing and able to entertain guests – as soon as the wren’s hatch their eggs and move on.
The nest step will be to look at the rest of this journey and find the better ways to repurpose and organize the stuff in the house, the yard, the heart, and the mind so that we can be positioned to live the best life possible.
Be blessed,

What are your tips to repurpose and organize? I would love to hear your stories. Comment below or be sure to let me know about any blog posts this DIY adventure may have prompted.